We made our own pizzas in the Wanderers Kneaded van and this is what we learnt
Getting the pizza onto the peel is HARD
 |
|
You can’t call yourself an Edinburgh student until you’ve spent a sunny afternoon on The Meadows with a pizza from the Wanderers Kneaded van.
The WK pizza van is an Edinburgh icon, and if you haven’t had their pizza yet I don’t know what you’re doing. Hands down, they serve some of the best pizza in Edinburgh and at a reasonable price. Not only is their pizza 10/10, but their location opposite the Marchmont-Meadows crossing means it’s the PERFECT picnic option for those sunny Meadows afternoons.
They now have a location down by Portobello beach too.

An elite Meadows picnic option
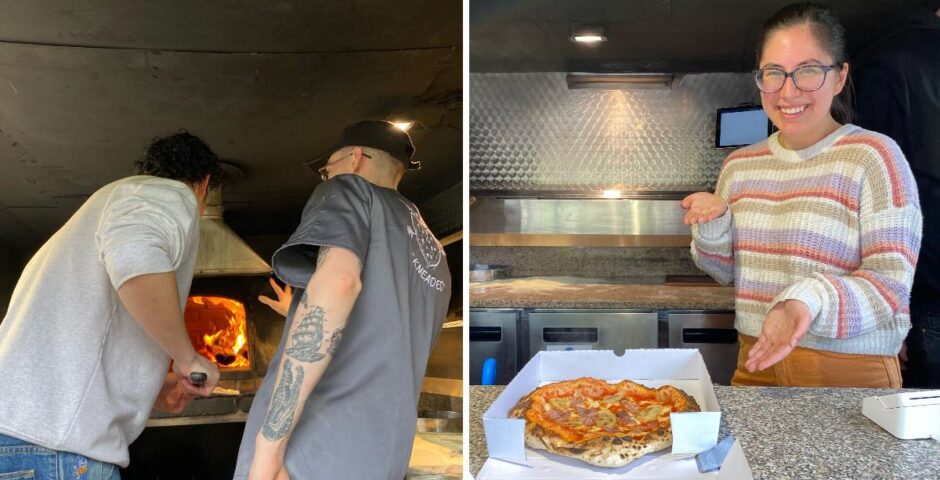
As Wanderers Kneaded regulars, we jumped at the chance to get inside the van and have a go at making a pizza for ourselves, under the apprenticeship of owner Mark and chef Lyle. Despite some previous homemade oven pizza experience, it’s safe to say this was a whole new level.
From secret tips for stretching out the dough to shooting the pizza into the wood-fired oven, here’s everything we learnt:
Dough
Starting with the basics, Wanderers Kneaded use dough that has been fermented for 72 hours in a central kitchen. It’s then picked up and stored in the van in special pizza trays.
To get started, we used a dough scraper to separate and pick up an already-balled piece of dough. This might sound simple, but it actually requires a certain technique that took me a minute to master.
Once we had our ball of dough, we started shaping it by curving one hand to form the edge of the pizza, turning the dough around with the other hand to try and create a circle. If this sounds confusing to you, that’s because it kinda is.
Once you have a pretty good pizza shape, you then pick it up and pass the dough over your knuckles, letting gravity do its thing until the dough is stretched to the size you want. If the knuckle method isn’t quite working out, Lyle also showed us a secret table stretching trick, where you dangle some of the pizza off the edge of the counter.
One of the best tips we learnt is that you can have lots of flour on the counter. This makes the whole process a lot easier as you don’t have to worry about your dough sticking.

Working that dough
Toppings
Unsurprisingly, this was the easiest part of the process as we had the freedom to customise our pizzas however we liked.
As a vegetarian, Noah went for a margherita with added onions while I opted for ham and mushroom.
Most of their ingredients are sourced directly from Italy, and the mozzarella they use has a lower moisture content. As someone who has had many homemade pizzas ruined by water coming out of the mozzarella, this was eye-opening.
If you like cheese pools on your pizza, you should put clumps of cheese close together. Noah opted for this method, but I personally prefer less cheesy pizzas so I spread my mozzarella around more.
Another secret we learnt is that they don’t cook their tomato sauce. Instead they use tinned tomatoes and blend it up with some basil. This makes a huge difference, as you can really taste the freshness.

Still dreaming about that tomato sauce
Transferring the pizza
This turned out to be the hardest part of the pizza making process, which is a double-whammy because it’s also one of the most critical parts of the process.


Getting your pizza onto the peel requires a sort of shovel and pull-back action that you repeat until your pizza is safely on board, however this proved to be a real problem for me.
The longer you leave your pizza out and the more you mess with the dough trying to get it on the peel, the more likely you are for things to go wrong in the oven.
After a few tries, I ended up handing the peel over to Mark to make sure this catastrophe was avoided. Another pro tip Mark taught us is that you can add a bit of flour under the pizza if you’re struggling to pick it up.
Noah obviously learned from my mistakes as he had no problem getting the pizza onto the peel.

Two different stories pictured here
In the oven
I know this is obvious, but the oven is HOT. This made me quite apprehensive about trying to get my pizza inside it, especially after my failed attempts to get the pizza onto the peel. Not only that, Lyle told us he’d recently singed his eyelashes, adding to my fear.
However, after a quick demonstration from Mark who likened the action to a magician pulling a tablecloth off a fully laid table, I actually managed to get my pizza into the oven with no hiccups.
Unfortunately, Noah was too enthusiastic with his launch and accidentally stretched out his pizza trying to get it off the peel.
The pizza only stays in the oven for a matter of minutes, with Lyle occasionally picking it up and moving it around – even setting fire to the crust for a brief moment.
Once the crust is nicely charred it’s ready to come out and be sliced.

Now we’re cooking with fire
Final thoughts
Overall, we were both really happy with how our pizzas turned out! In fact, I’d even go as far as to say they were proper Wanderers Kneaded quality.
Not only did we learn many great tips that we’ll be bringing to the homemade oven pizza making going forward, we also learnt a lot about running a pizza business from a van.
There are so many added things to think about when your kitchen is a van, including the limited water supply, the lack of storage and work space, and the heat that comes from having an oven in such a small space. It’s no surprise that hot summer days in the van aren’t for the weak.
If you haven’t already, make sure to pay the Wanderers Kneaded van a visit before you leave for the summer. They have so many pizza options and you can even ask them to make you a custom order.

The final result
Recommended related articles by this writer:
• We made our own haggis burritos at Bonnie Burrito and this is how it went
• I bought a £1 cherry tomato plant from Scotmid to see if I could actually grow some tomatoes
• What it’s like visiting the Edinburgh Chihuahua Cafe as a cat person
Latest

Dramatic bodycam footage shows moment Empire State Building climbers are arrested

‘You can’t be up here’

‘Like a sister’: All the Love Island 2026 cast members who already know former Islanders
A former cast member said he ‘knows Priya’s body’


People urge caution on new dating app Goose as INSANE terms and conditions emerge

Okay, maybe I won’t download


Love Island’s Tina says Aidan ‘played a game’ to get her to pick him as she exposes what he said

‘You don’t see half of it’

The four qualities Love Island’s Lorenzo wants in a partner, and Julia ticks all his boxes

One of them is so rogue

Ranked: All 24 Russell Group universities by interest and finance costs – Oxford pays £36.8m

Oxford pays over five times more in interest and finance costs than Cambridge, despite both being old, wealthy universities

KATSEYE just revealed the reason for Manon’s hiatus, and it’s not what people were thinking

Apparently there’s no feud in the group

English tennis star hits back after opponent accused him of ‘dishonesty’ in viral Wimbledon clash
He also explained what actually happened
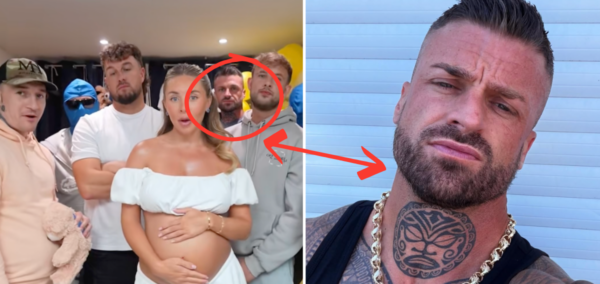
Get to know the men who peed on Bonnie Blue at her golden baby shower, and their graphic content
And each more jarring than the last

Dumped Islander reveals which Love Island girl has the deadest chat and I’m howling
The tables have turned

Durham alumnus behind Wallace and Gromit knighted in King’s Birthday Honours

Sir David is one of 24 Durham alumni, honorary graduates and friends recognised

Every single time Love Island was forced to remove an Islander, and the scandalous reasons why
Honestly where do they find these people?!

Relationship expert predicts who will do what at Casa Amor recoupling, and the mess it will cause
The villa is about to be turned upside down

Gals! Love Island 2026’s Jordon has a famous YouTuber sister with over 11 million subscribers
His family also has a channel with almost six million subscribers

‘Match made in hell’: Queer Eye’s Karamo Brown dating jailed celeb who was engaged last month
What an awful way to end Pride Month

All the major celebs spotted enjoying Harry Styles’ Together, Together tour in London
There have already been two Traitors winners

Mother sentenced after scamming friends out of $20k in sick influencer travel scheme
She even faked cancer as an excuse